Introduction
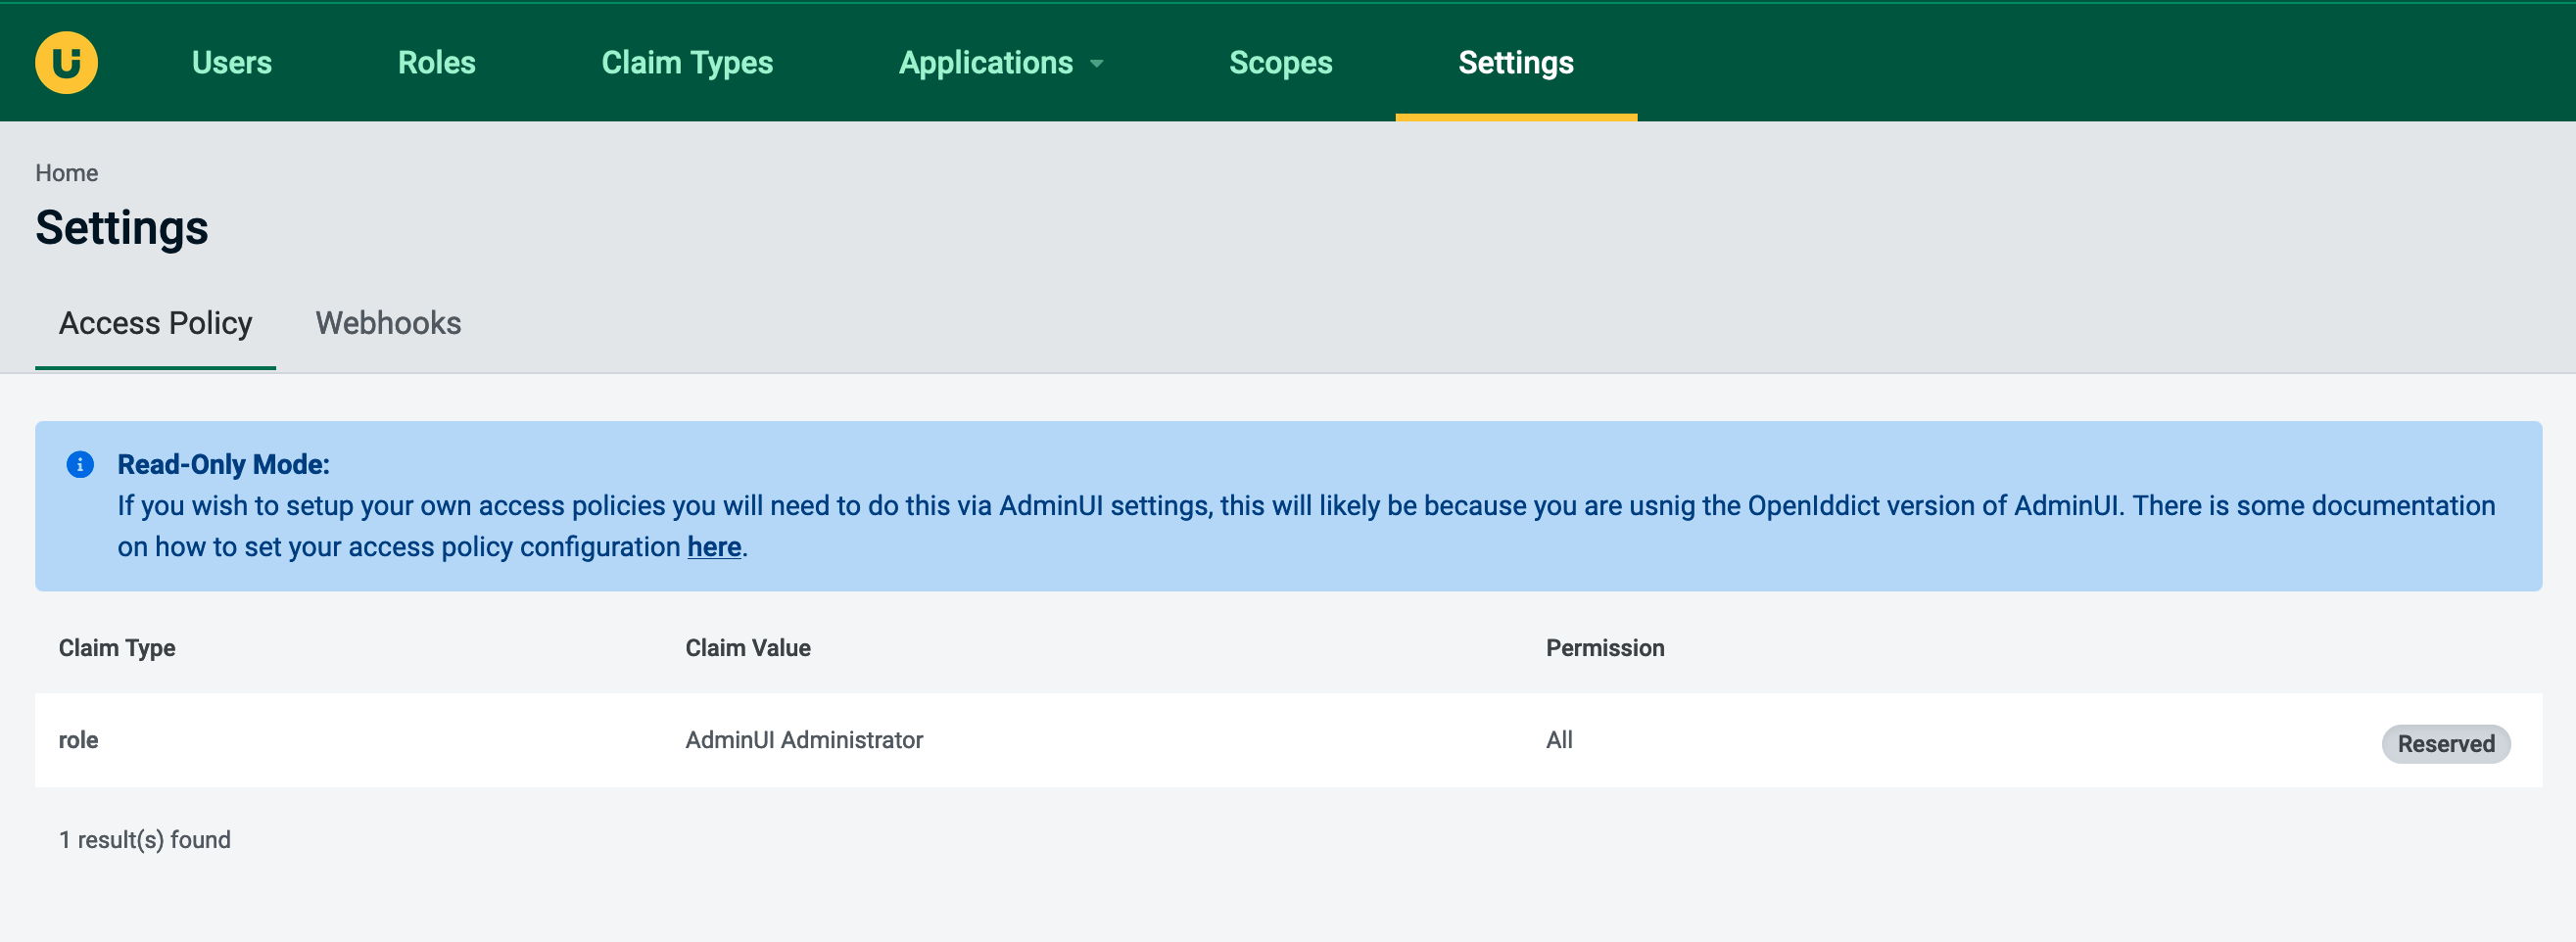
Access Policy maps claim values to permissions, each time a user attempts to perform some administrator functionality their claims are evaluated against the policy to produce a set of permissions. Only if they have the appropriate permission will they be able to execute the functionality.
Managing Your Access Policy
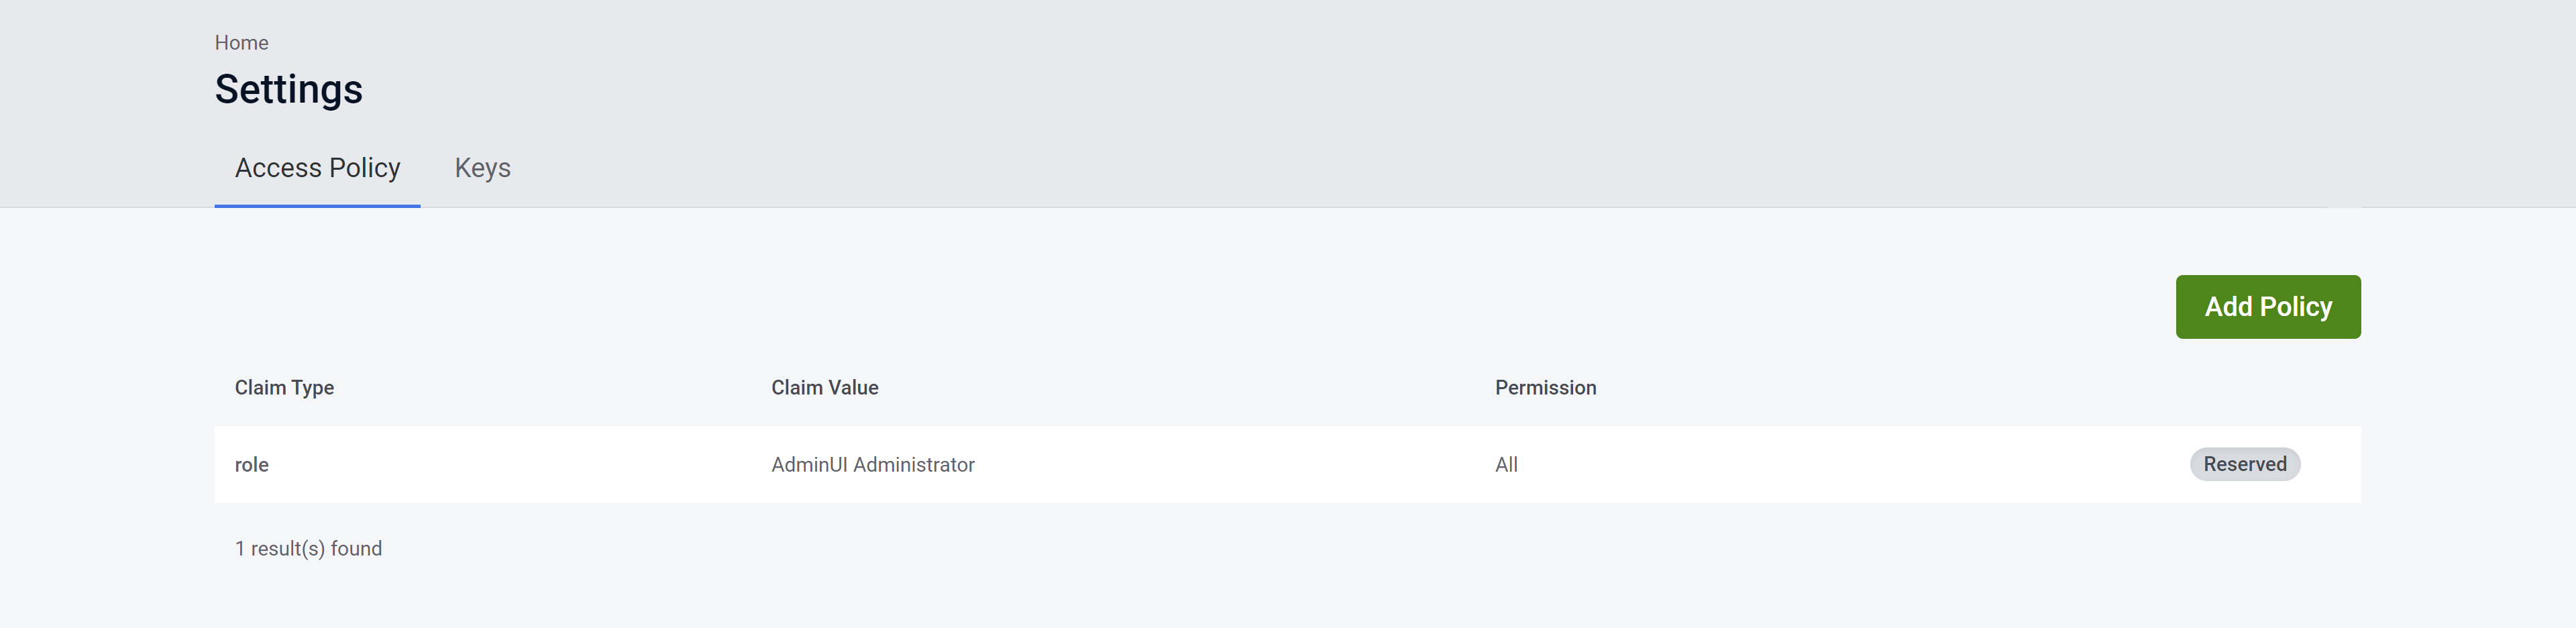
In order to manage your access policy, you will need to update your app setting configuration for your AdminUI application and restart it. This will then make these policies visible in the tab that displays available access policied in AdminUI under the settings tab.
To make use of this new policy, you will need to give this new claim to a user. Users can get permissions from multiple access policy statements.
Only users with the ‘All’ permission are able to assign claims referenced in the access policy to themselves or other users.
Warning: any user that already has the claim in the access policy you are adding will be given the permission. This is also true if an access policy is removed, where any users with that claim will lose that permission.
Permissions
Users without any permissions will be greeted with an unauthorized screen after logging in.
There are three read/write permissions available, each giving access to different actions within AdminUI:
- User Manager:
UserManagerThis permission grants control over User and Role management - OpenIddict Manager:
AuthorizationServerManagerThis permission allows users to create and modify Claim Types, Clients, APIs and Scopes - All:
AllThis permission allows all of the above and control over Access Policy Management
There are 3 read only permissions available:
- User Manager Read Only:
UserManagerReadOnlyThis permission a user the ability to view Users and Roles - OpenIddict Manager Read Only:
AuthorizationServerManagerReadOnlyThis permission allows to view Claim Types, Clients, APIs and Scopes - All Read Only:
AllReadOnlyThis permission combines the two read only permissions above
By default, the 'AdminUI Administrator' role is set up by default with the All permission. This mapping cannot be removed.
Access Policies and External User Stores
If you are using an external user store (e.g. AzureAD) you may need to create access policies based on known claim types for your users.
For example, you may want to create an access policy based on an external user's email claim type.
To do this you will need to set the CustomAccessPolicies AdminUI setting. Would look like this in appsetting.json for example.
{
    "CustomAccessPolicies": [
        {
            "Type": "email",
            "Value": "some.user@yourorganisation.co.uk",
            "Permission": "All"
        }
    ]
}
or this if directly modifying AdminUI setting object set the following as the value for CustomAccessPolicies
[
    new AccessPolicyOption
    {
        Type = "email",
        Value = "some.user@yourorganisation.co.uk",
        Permission = Permission.All,
    }
]
Adding an Access Policy to a Client or User
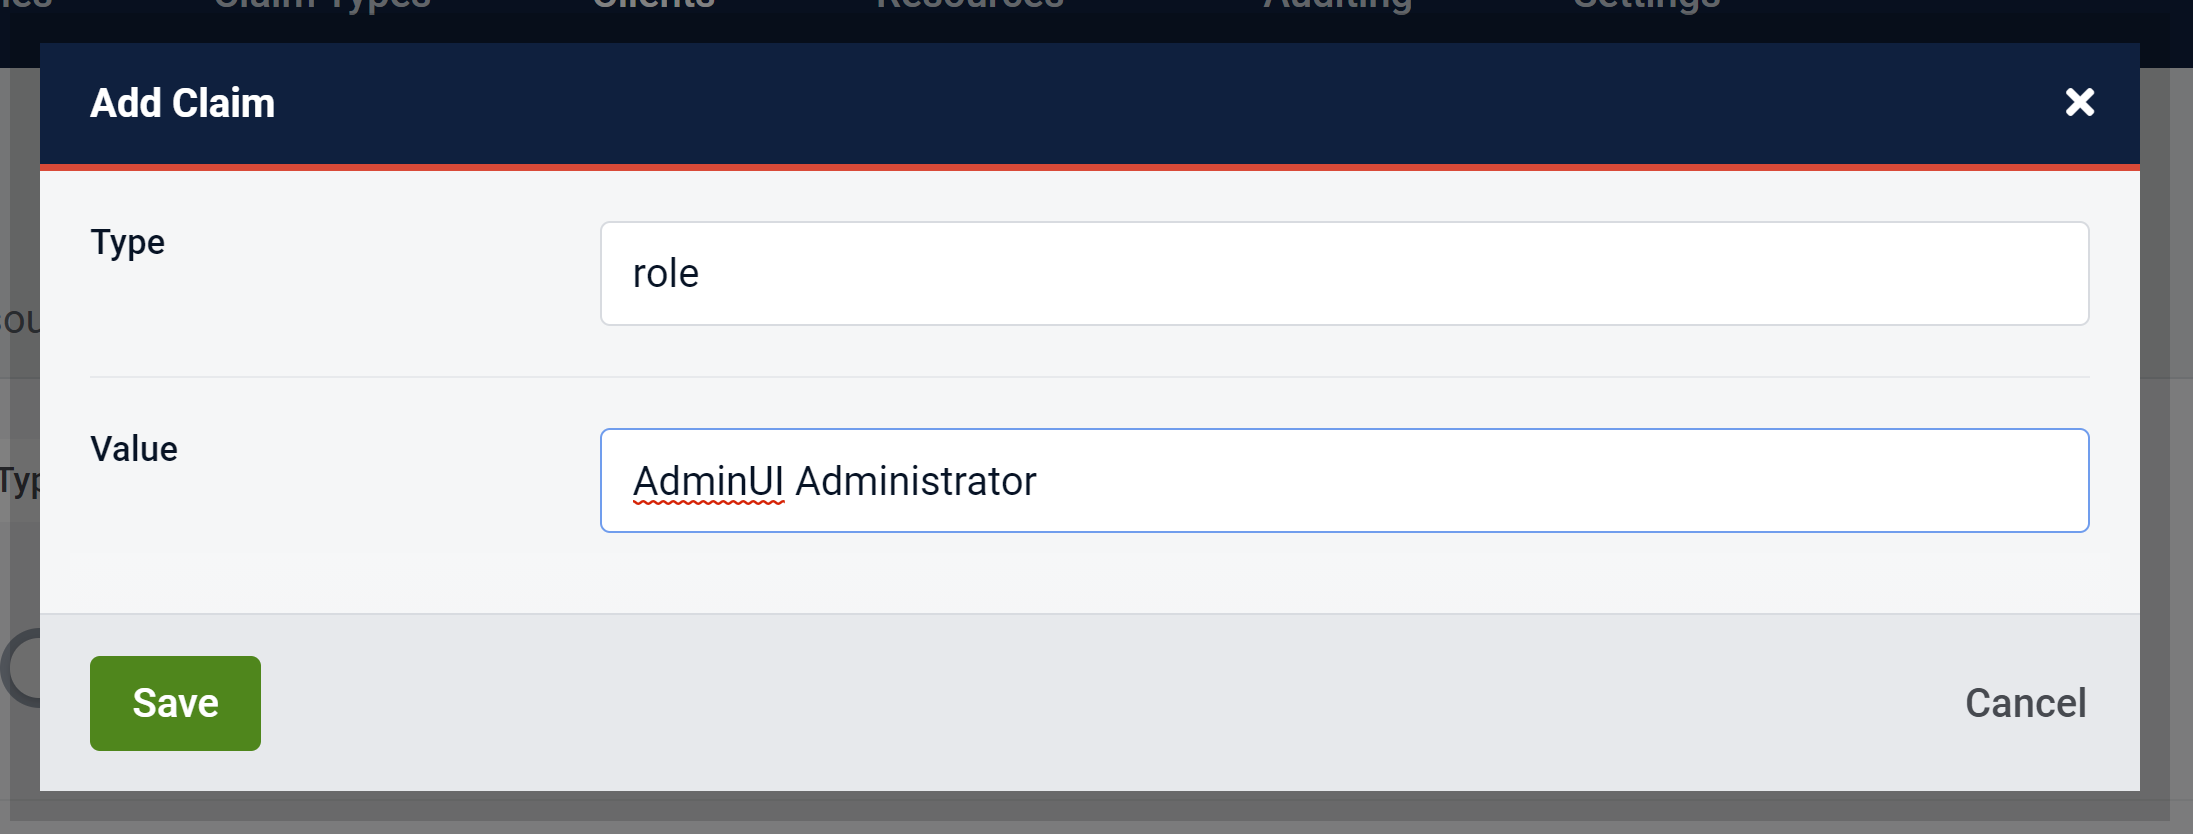
After creating your Access Policy as described in the Managing Your Access Policy section above you can add it to your client by clicking the 'Add Claim' button.
You will be greeted with a modal that requires you to enter the 'Type' and 'Value' of the Claim you are wishing to add. These values correspond to the Claim Type and Claim Value of the access policy you have created.
For example, if you are adding a client that requires the AdminUI Administrator Access Policy as shown below:
You should be entering the Claim Type 'role' and the Claim Value 'AdminUI Administrator' into the 'Add Claim' modal in the edit client view as shown below.
After saving these changes, your client should be able to interact with the AdminUI API correctly.
Viewing Client Access Policies
From the Clients page, click the edit client button then navigate to the 'Advanced' tab, then click the 'Claims' button. Here you can see the various Claims assigned to a client and is where you add your Access Policies to your clients.